When it comes to significant do-it-yourself (DIY) home improvement projects, painting is one of the easiest to achieve because it is a job a novice can accomplish without much investment. It’s also a task that will allow homeowners to spruce up their interior or exterior walls with a bit of practice. Just follow these five expert tips for DIY home painting. All you need to decide is the right color that matches your décor. Once you think like professional house painters, you’ll become proficient.
1. Take the Time to Prep

Before starting any DIY painting project, you want to gather all the supplies you will need to finish the job, including a gallon of paint for every 400 square feet. It takes about two gallons for an average sized room, but you can calculate your need by multiplying the height times the length and add appropriately. Be prepared when you are painting more than one room. You also want to buy a five-gallon bucket because formulas are not precise since they are mixed on demand. You won’t want to use one gallon only to find out the next one is a different shade. It’s a common novice mistake that is very costly.
Combining paint cans allow for color consistency. You will also need to buy primer, various sized paint brushes, a pouring spout, a screen, a tape measure, a stirrer, a screwdriver, a roller tray, a roller cover, a disposable liner, canvas drop cloths, painter’s tape, hole filler, a sponge, and plastic sheeting if you need to cover furniture or your car. You also need to prep for time management. Taking your time will ensure you get a professional-grade paint job that will last for years. Saving a bit for touch-up pays off.
2. Prime Your Walls
First, use a sponge to wipe your walls down to remove any dust or debris clinging to it. You also might be asking yourself why must I prime my walls before painting. Primer acts as the undercoating that seals a surface area, which makes the paint easier to apply and adhere to the first layer instead of the drywall itself. Most especially if your walls have never been painted or has been many years since the last application, adding a primer will smooth out any repair materials and allows the paint to adhere correctly.
Using primer also will make the difference between a novice look and a professional appearance. While it does add to your overall costs and time for the priming, it will have added benefits because the quality will be long-lasting and professional looking. It also allows you to cover up wall imperfections, stains, and repair patches. Primers come in water-based, oil-based, and shellac mixtures which vary in volatile organic compounds. You will want to choose a low VOC blend if priming indoors because of the air quality.
3. Follow a Systematic Routine

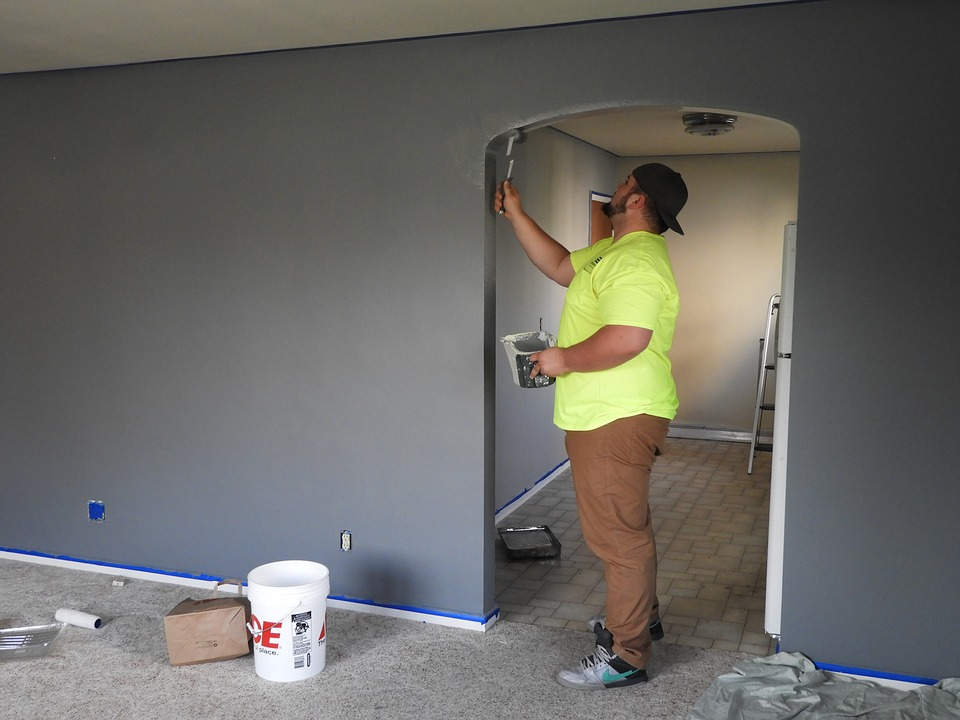
Expert painters follow a systematic routine when painting, which begins with the trim and then moves to the ceilings and walls. It will make your job easier, faster, and cleaner. As you develop an order, it becomes second nature to follow the steps in unison. It is also easier to use blue painter’s tape on the trim rather than try to create a larger work zone around the walls. You also don’t have to be an expert because it’s no big deal if you get a bit of paint on the walls since you will be priming and painting after the trim dries.
You will want to let the trim sit for twenty-four hours, so you can move on to other rooms or outside areas while it is drying. That way, you can go back where you began and start painting the ceilings which will give each one time to dry as you move in the same direction as the trim. You can then begin to prime each wall in that order. As the primer dries, you can start painting them. Because you are following a routine, you will be much less likely to make costly mistakes, damage pricey heirlooms, or smudge your paint.
4. Never Remove Painter’s Tape Until Paint Is Dry
Applying the painter’s tape is a crucial step, but removing it is just as important because a little mishap will lead to a new paint application. Always make sure the paint is completely dry before trying to remove it so that it looks and feels like a professional job. Always check the directions of your painting tape brand for how long to leave it in place. As a rule, you should remove it once you finish the painting and drying is completed.
It will prevent it from drying or hardening. If left too long, it will adhere to the paint and peel it off or cause uneven lines upon removal. You must also remove it slowly at a 135-degree angle toward the body. If you have trouble, use a cutter between the paint and tape to pry it off softly. If you experience tape residue on the surface, use a damp sponge with a bit of soapy cleaner to gently remove it after the paint is completely dry.
5. Use Cotton Canvas Drop Cloths Over Plastic

Cost is often an issue when it comes to DIY home improvement projects, but skimping on supplies is a rookie mistake because it can lead to serious repair expenses after you finish. So, if you have the choice between plastic and canvas, go for the drop cloths as it will protect your home, carpets, hardwood floors, and furniture much more thoroughly.
Keep in mind that large paint spills can seep through the canvas, so you won’t want to leave it on there too long. The good news is that you can use it in every room you paint.
Are you ready to go from a beginner to an expert with just these five DIY painter expert tips? The more you practice, the better you will be when it comes to home improvement projects.


 POSTED BY

